



20 Bottle Brush Christmas Tree Ideas
This post may contain affiliate links. Please see my disclosure policy for details.
There’s something so charming about bottle brush Christmas trees. They’re cute, they have that classy vintage Christmas feel, and you can sneak one into just about any spot in the house. A little green tree on the kitchen windowsill, a snowy one tucked into a teacup, a whole forest on the mantel if you’ve got room. (And if you’ve ever brought home one more little tree because surely it’ll fit somewhere, well, it probably will.)
You can do so much with things you already have. A favorite piece of milk glass or an old brass candlestick can make even the simplest little tree look right at home.
How to Decorate With Bottle Brush Christmas Trees
1. Tuck Snowy Trees Into Milk Glass
Set snow-dusted green trees in white footed bowls and teacups, then tuck a little moss around the bases. Thin red bows tie the mismatched pieces together, and a few flameless votives give the display a soft glow.
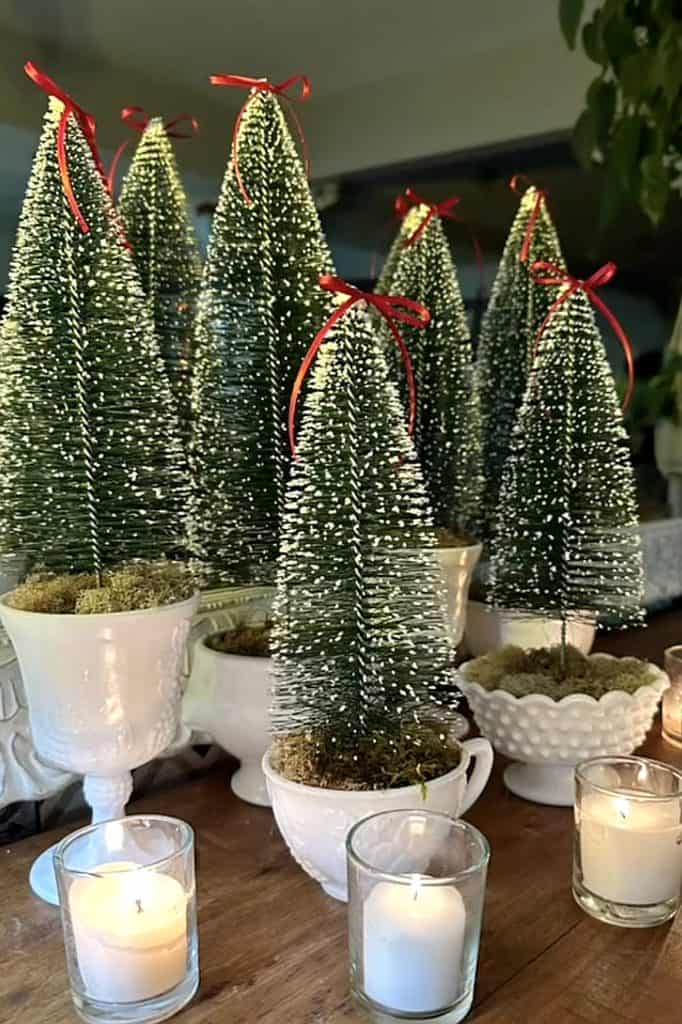
Photo by tarahtornado
2. Make a Light-Up Forest in a Wooden Tray
A long, narrow tray is just the right shape for a little forest on a bookshelf. Place taller trees near the ends, tuck the short ones in between, and weave a strand of tiny lights through the branches. A few red bows are plenty to give it that classic Christmas look.
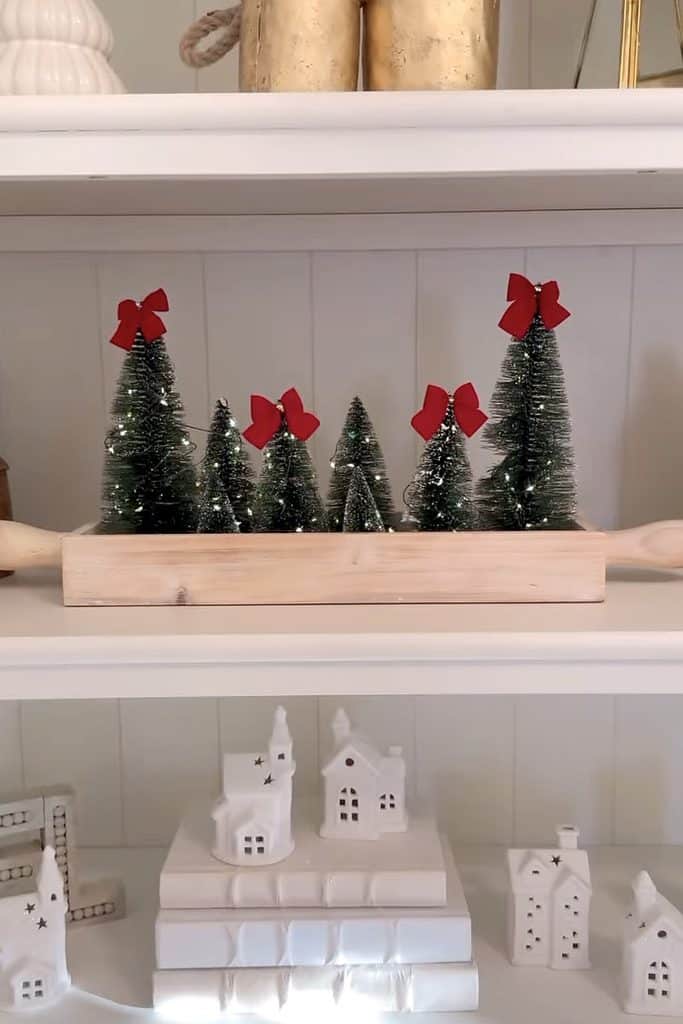
Photo by ashleymariesavage
3. Line the Kitchen Windowsill With Colorful Trees
The kitchen windowsill is a good spot for trees with shiny little ornaments because they catch the daylight while you’re at the sink. Slip a few into blue-and-white vessels and leave others on their original bases so the heights vary along the sill.
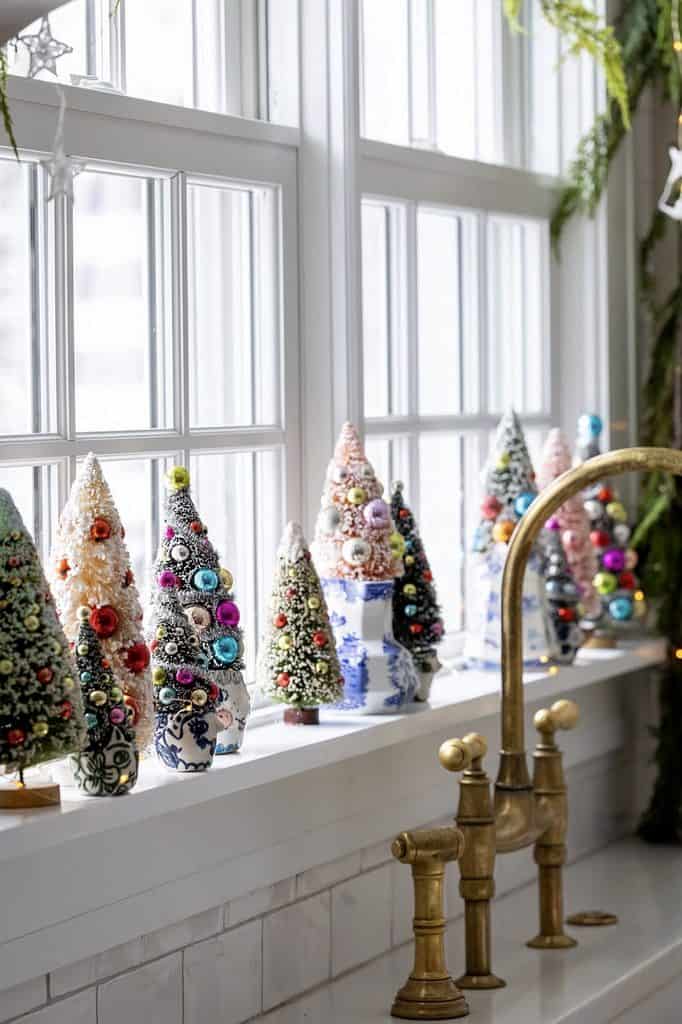
Photo by inspiredbycharm
4. Give Your Sparkliest Trees a Pedestal
Footed bowls make those little trees covered in beads and baubles feel like something worth putting on a pedestal. Group two or three bowls of different heights and give each one a tree. A plain white compote works just as well if you’re shopping your own cupboards.
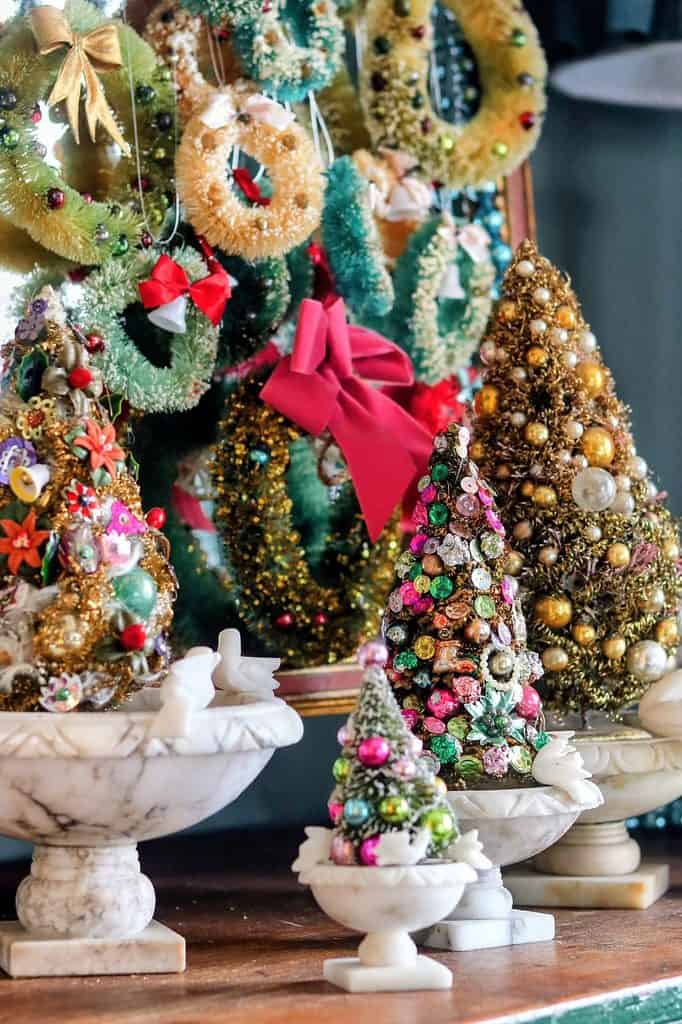
Photo by megillicutti
5. Fill a Hutch With a Vintage-Style Tree Collection
If you’ve collected enough little trees to fill a hutch, oh my goodness, let them have the hutch. Put the tall ones at the back, line up the tiniest trees along the front, and lean a few mini wreaths against the back where there’s room to see them.
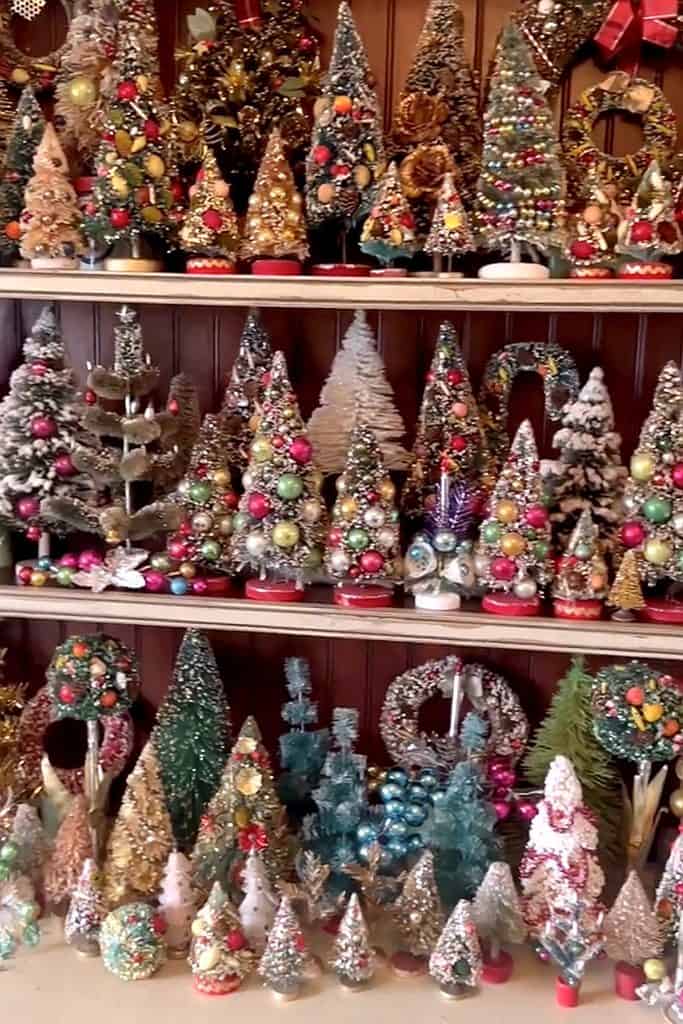
Photo by mrssantaclausss
6. Set a Snowy Forest in Front of a Mirror
A mirror makes a narrow row of trees look twice as deep. Set your tallest flocked trees toward the back and tuck smaller ornament-covered ones in front, where you can see all those tiny details and their reflections.
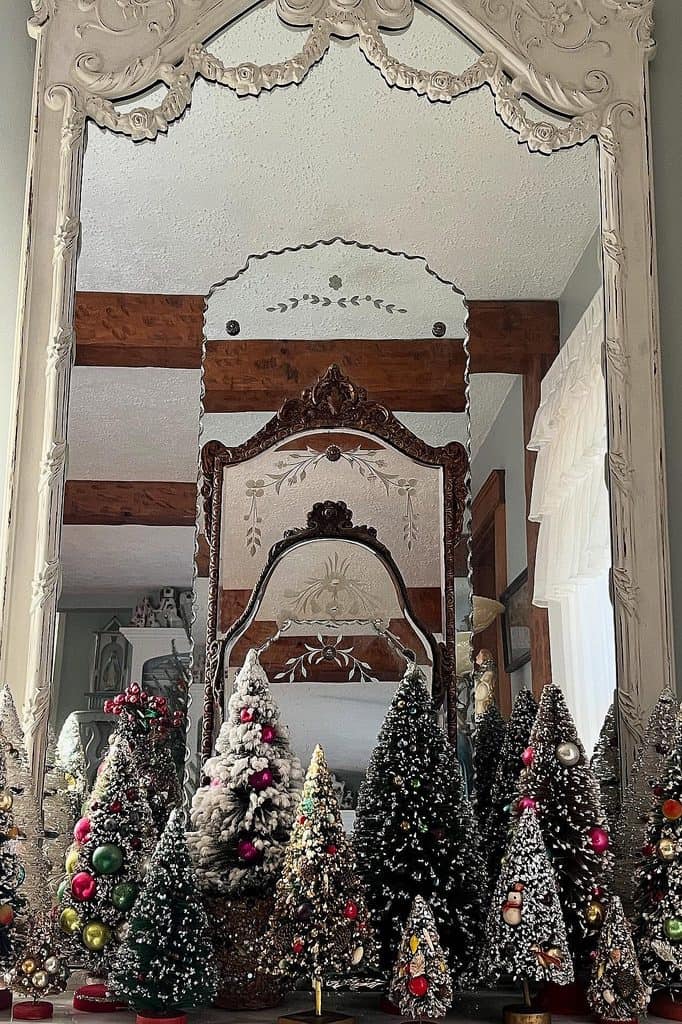
Photo by sharonsvintagestyle
7. Mix Bottle Brush Trees With Smooth Cone Trees
If you’ve got a mix of bottle brush, cone, and carved-style trees, put them together on the same shelves. Smooth finishes break up all those bristles, and repeating deep green, cream, and burgundy across the shelves makes the collection feel connected.
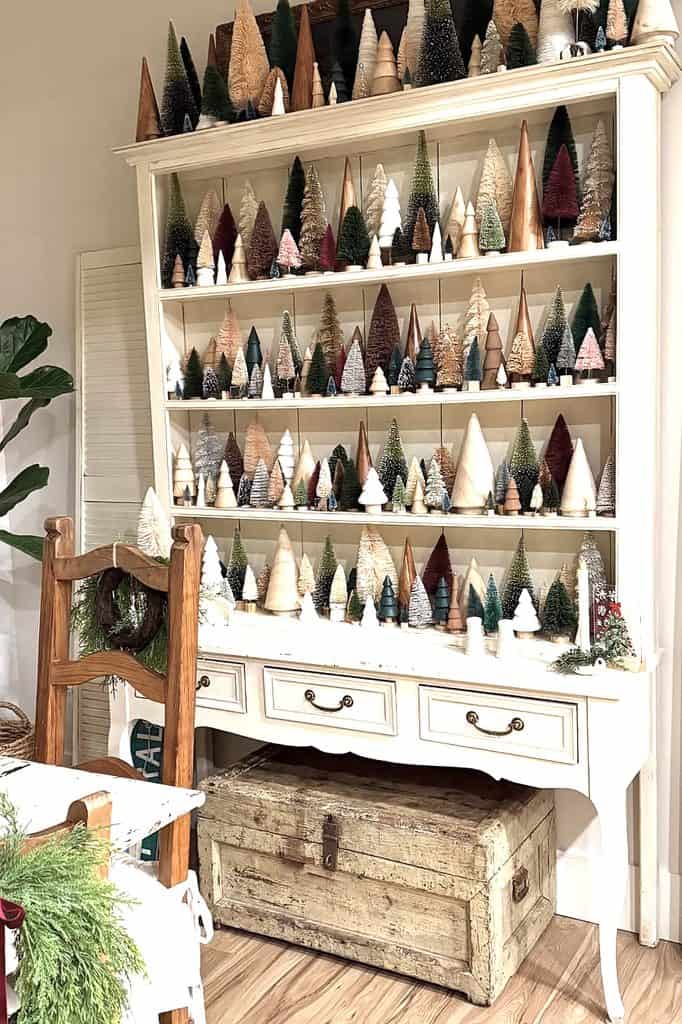
Photo by fishtailcottage
8. Pair Blush Trees With Mini Disco Balls
Blush and cream trees are pretty on their own, but those tiny disco balls make the whole thing more fun. Gather the trees in a woven tray, roll a few mirrored ornaments into the gaps, and add flameless tapers for height.
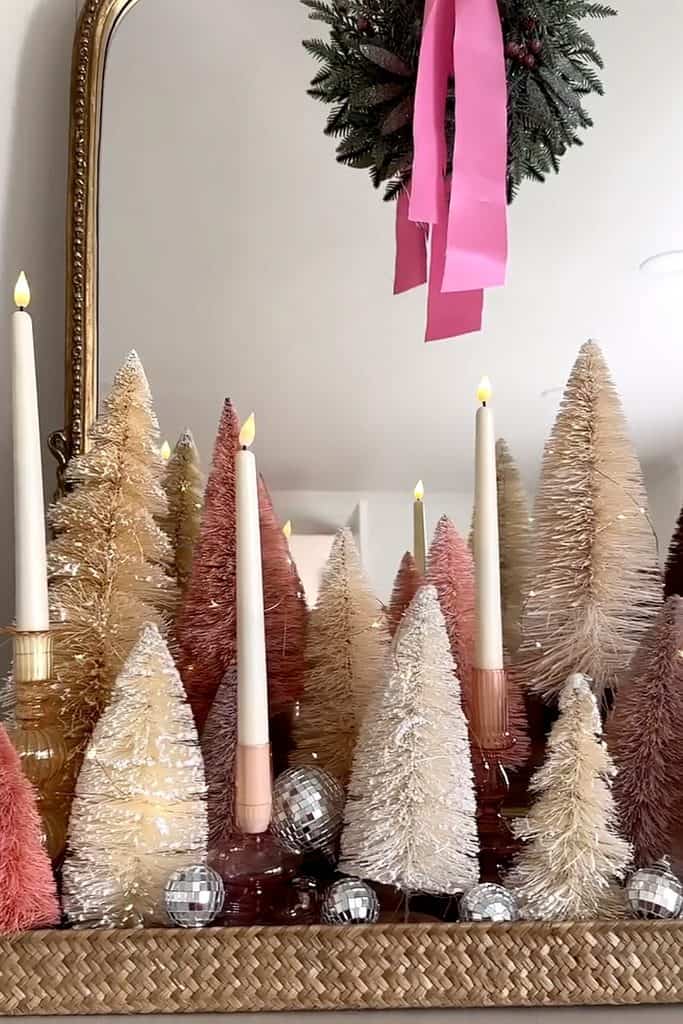
Photo by debtrette
9. Arrange Your Trees by Color
If you have trees in a dozen colors, try grouping them into loose bands across a sideboard. Let teal mingle with green and pink fade into red, then run a strand of tinsel along the front to hide some of the bases and connect the display.
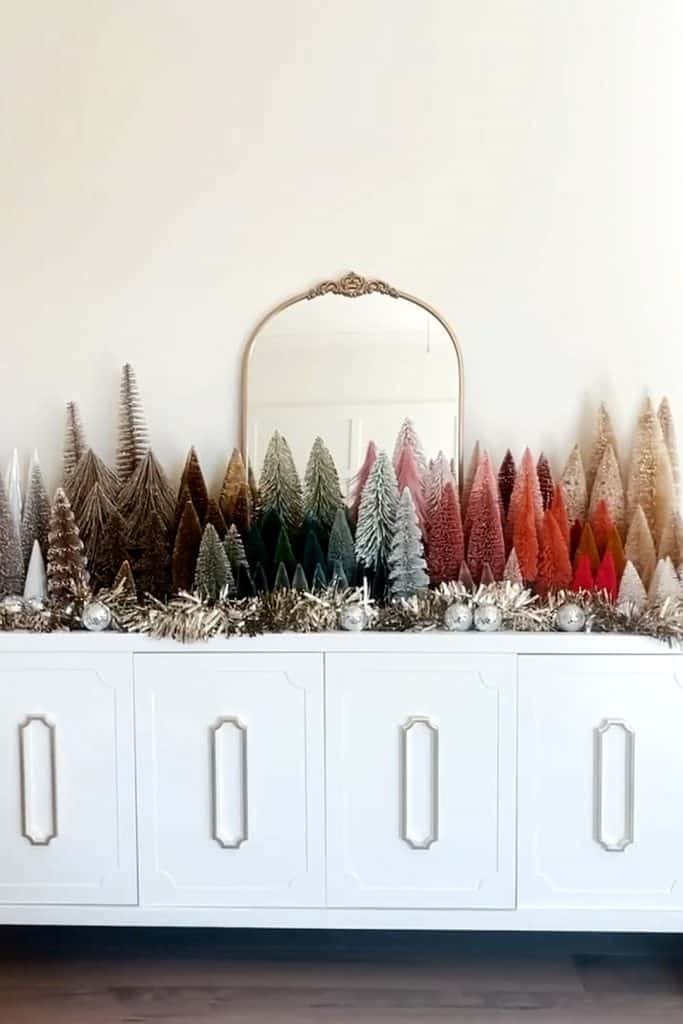
Photo by ashleymariesavage
10. Style Cream Trees in a Blue-and-White Tureen
Pull out a pretty soup tureen and stand a couple of cream trees inside with some blue books. The books echo the pattern on the china, and a soft blue bow with a little bell gives the arrangement just enough Christmas detail.
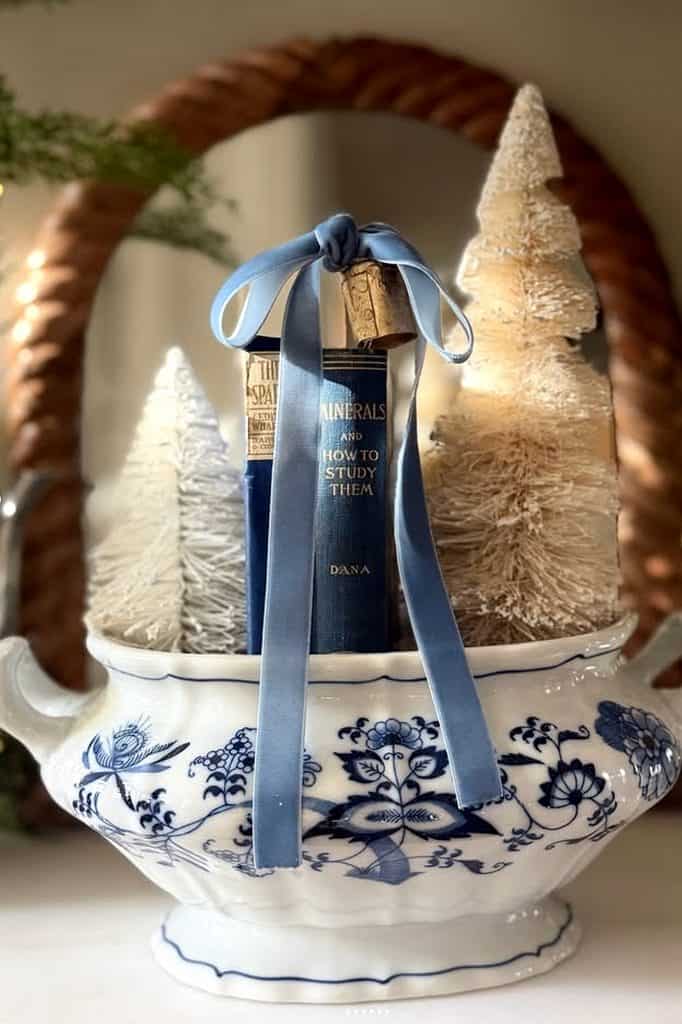
Photo by poshonapenny
11. Use Tiny Trees as Vase Filler
Here’s a fun use for the really small trees. Tumble them into a wide glass vase around a smaller vessel that holds your greenery, turning a few trees sideways so their colors show through the glass. Frosted pine and gold stems make a pretty topper.
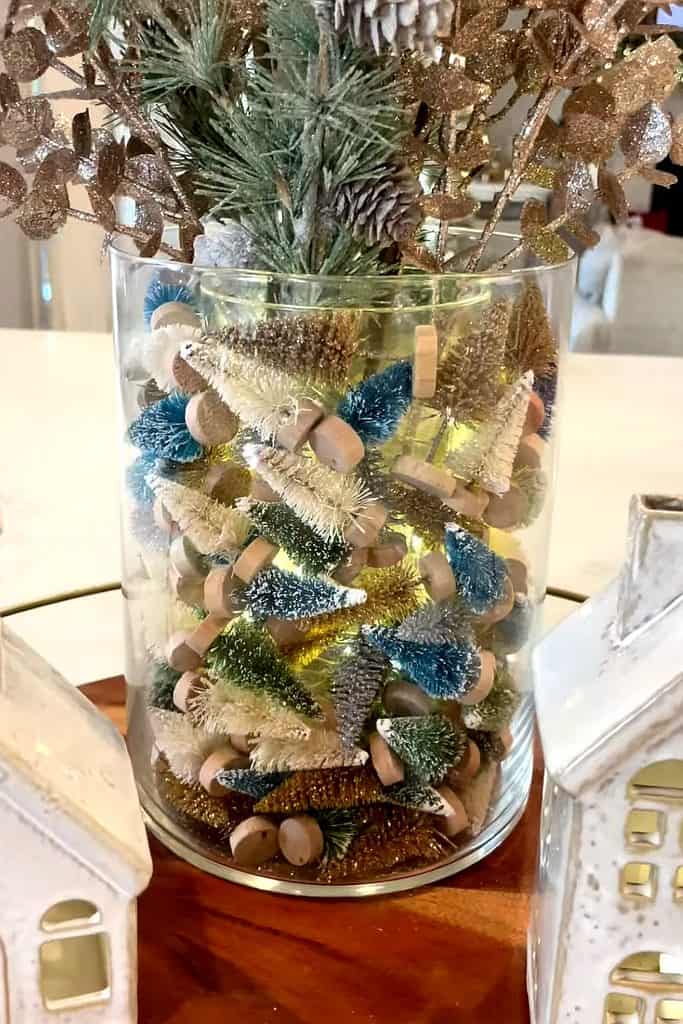
Photo by kelsimsavage
12. Build a Little Forest on a Tiered Tray
A tiered tray gives a bottle brush forest some height without taking up much counter space. Put your tallest trees on the top tier, then use old thread spools and little lace-trimmed containers to raise a few of the shorter ones so they can peek through.
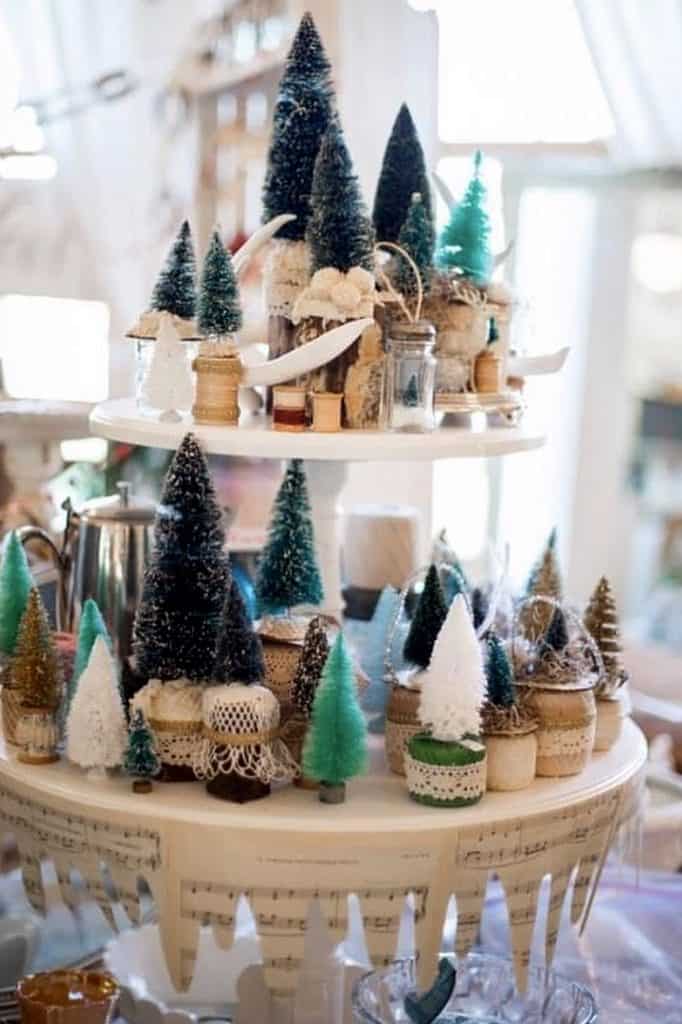
Photo by vintagehomecolleen
13. Turn Brass Candlesticks Into Tree Stands
Perch a few small trees on sturdy brass candlesticks to lift them above the greenery on your Christmas table. Mix in shorter trees and little gingerbread houses at table level, and use flameless tapers in the remaining holders for a cozy glow.
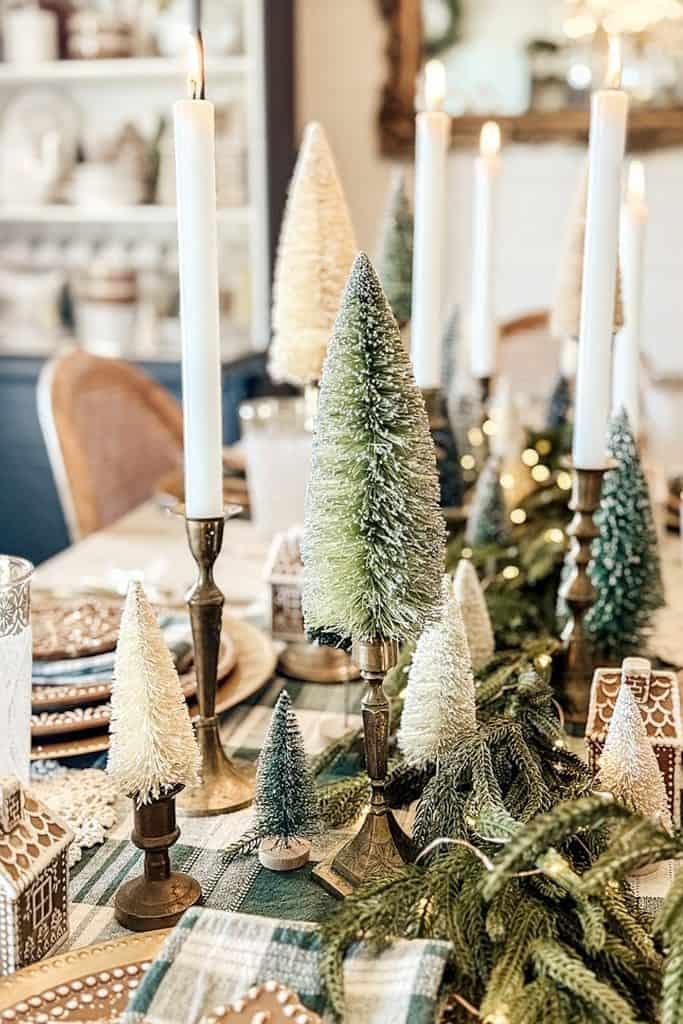
Photo by returninggrace
14. Put a Christmas Village on an Old Scale
An old balance scale makes the cutest pair of hilltops for a Christmas village. Set a little house on each side, then group mint, cream, and snowy green trees behind them so the rooflines stay in view. You could get a similar effect with two small risers at different heights.
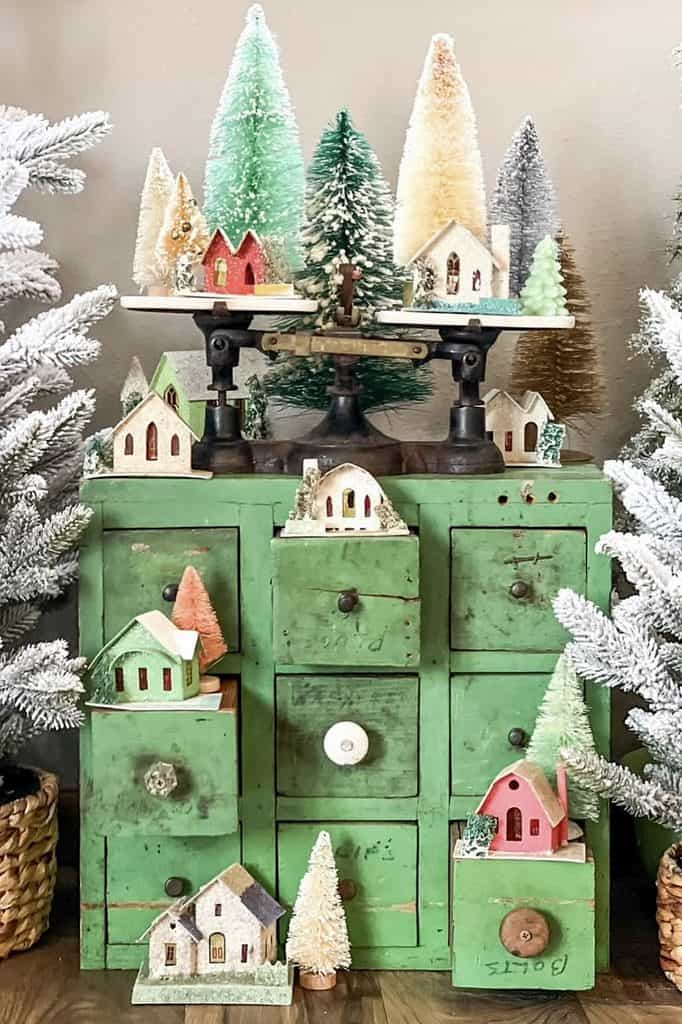
Photo by barn_again
15. Give a Colorful Mantel Village Some Height
Tuck little green trees between the houses on a Christmas mantel, then raise a few bright trees on sturdy candlesticks at either end. The taller trees frame the village, and you can repeat their colors in the baubles tucked into the garland below.
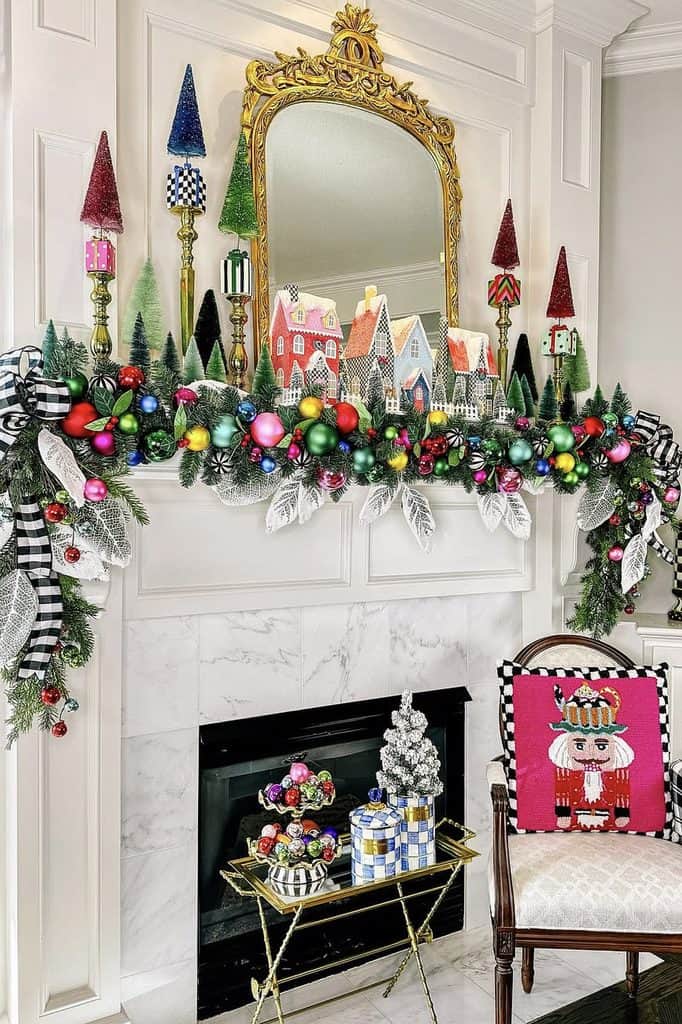
Photo by suzannezinggstyle
16. Put Pink and Green Trees in Blue-and-White Pots
Line up a few blue-and-white pots and alternate snowy pink trees with bright green ones. The blue pattern pulls all those colors together, and tiny pink bows on the green trees are an easy detail to copy with leftover ribbon.
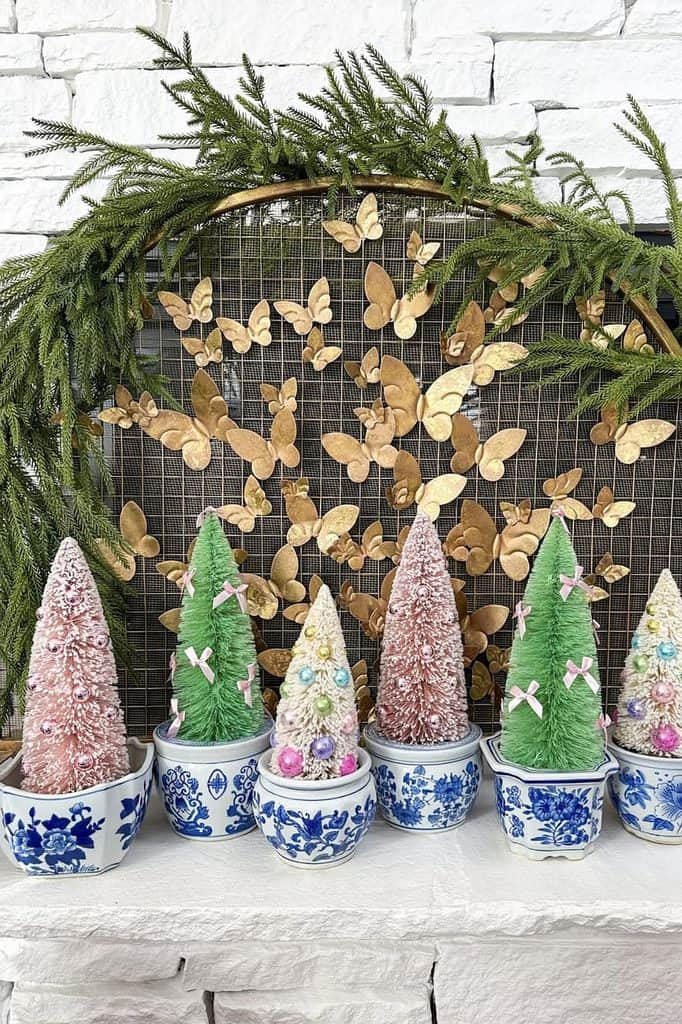
Photo by bespokeinteriors.nc
17. Fill a Ceramic Swan With a Tiny Christmas Forest
If you spot a ceramic swan at the thrift store, just think what you could do with it at Christmas. Arrange taller trees along the back, nestle the smallest ones up front, and tuck gold tinsel and miniature baubles around the bases. A pink bow makes it look like the swan got dressed for the party, too.
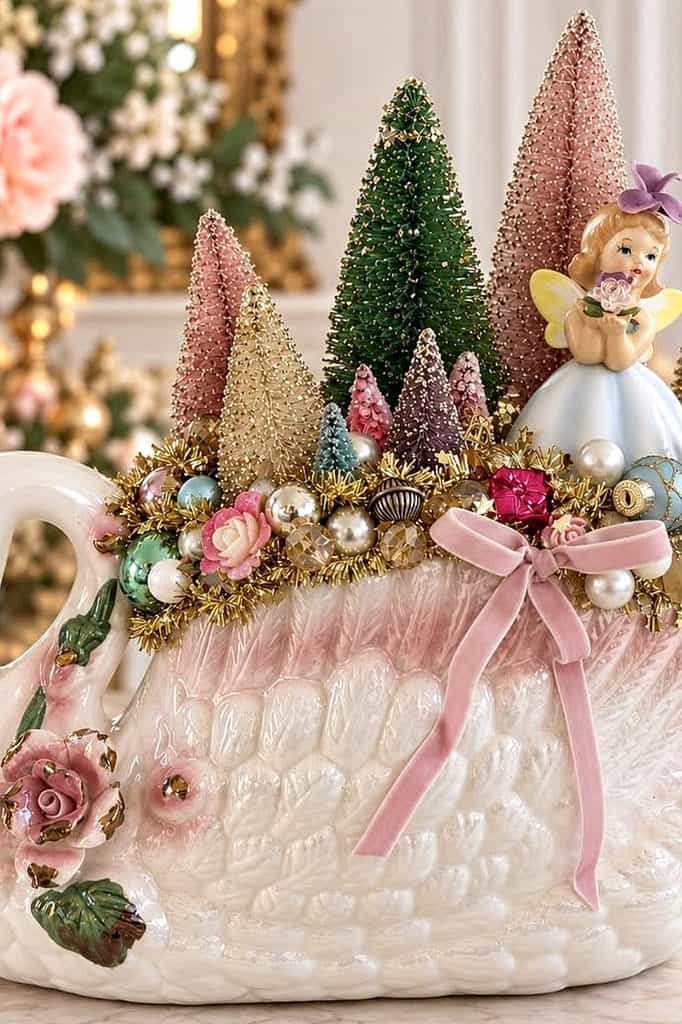
Photo by buttercupspaintedcottage
18. Make a Pink and Teal Christmas Centerpiece
Group decorated little trees in a footed silver bowl and tuck greenery around their bases to soften the rim. Carry the pink and teal through to the table linens, ribbons, and smaller trees so the whole table feels tied together. A few pink deer are a fun finishing touch.
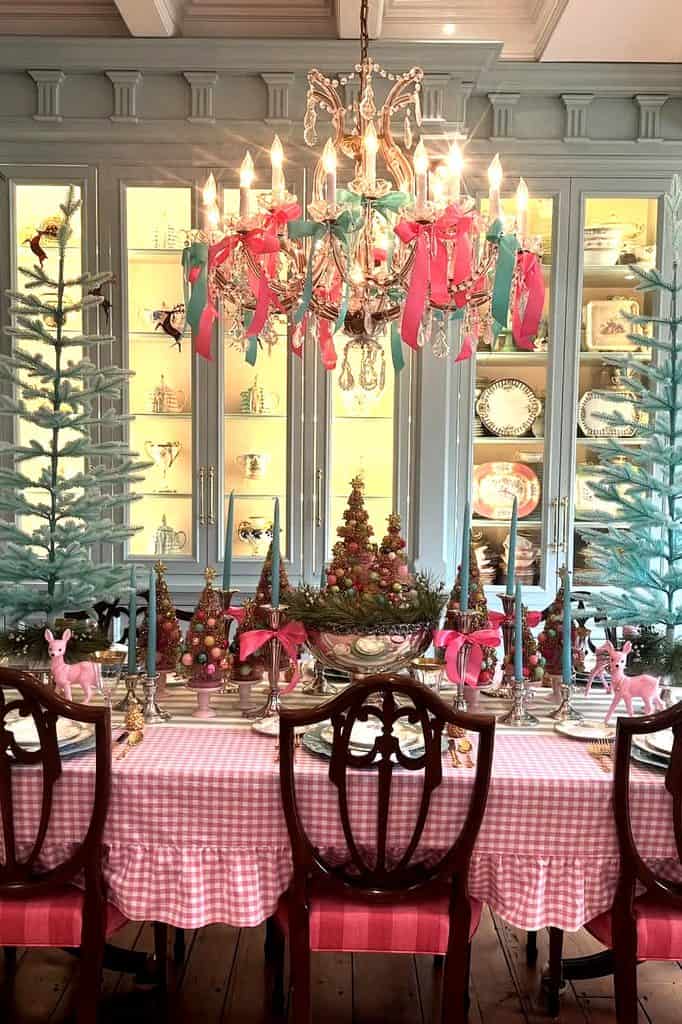
Photo by theriverwoodhome
19. Build a Sideboard/Piano Display Around One Big, Colorful Tree
Pick your most decked-out tree and give it the best spot on the sideboard or piano. Set shorter trees around it, then pull a few ornament colors into a beaded garland above. The smaller trees can be as mismatched as you like when they share a few colors with the big one.

Photo by megillicutti
20. Arrange a Mini Forest Between Two Lamps
That space between a pair of lamps is just right for a little forest. Put your tallest decorated tree near the middle, fill in around it with smaller ones, and borrow a color from the artwork above for a ribbon or a few baubles. Here, the turquoise ribbons pick up the blue in the portrait and the painted dresser.
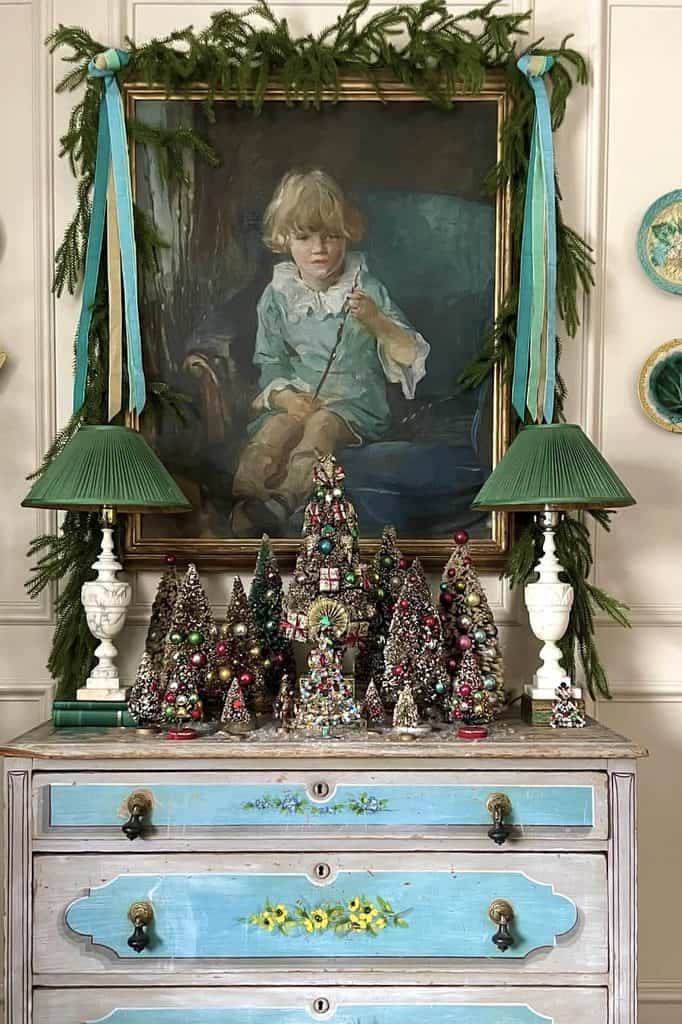
Photo by 7sevenlakesdesign
If you’re starting with just a few trees, try a little group of three at different heights. Set them on a tray or in a shallow bowl so you can move the whole display from the kitchen counter to the dining table when company comes. And if there’s room for one more tiny tree in there… well, you know how that goes.